Video: How to Build a Patio Wall with Curves
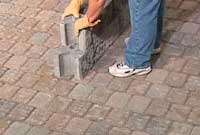
Build Wall Up to the Curve
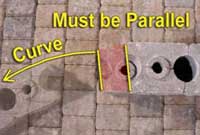
Adjust the Curve
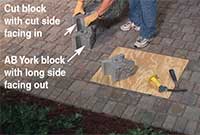
Begin the Curved Wall
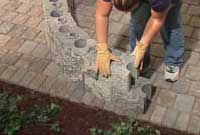
Transition Out of Curve
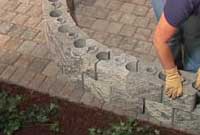
Use Cut Blocks to End Curve
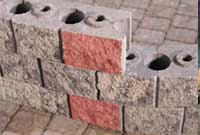
AB Dublin 1/2 Length Block Pieces
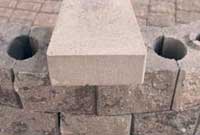
Center Caps on Wall
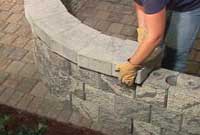
Alternate Caps to End Curve
Step 1: Build the Wall to the Start of the Curve
Install the first two courses of wall panel up to the approximate location where the curve will begin. Building the first two courses at the same time ensures proper alignment.
Step 2: Adjusting the Layout of the Curve
Before beginning the curve check to make sure that both courses are angled correctly. Both courses need to be parallel with each other and angled toward the direction of the curve. If one block is angled the opposite direction, remove the last block and slide the entire course over one block to correct.
Step 3: Begin the Curve
On the first course, install an AB York block by placing the long side of the AB York block facing the outside of the curve. On the second course, where the wall changes from a curve to a straight section, an AB Dublin will need to be cut in a half (1/2) length to be used at the transition. This transition piece will be needed on every other course. See How-to sheet #210: modifying Blocks for more information.
Step 4: Build the Curve
With the curve started, stack additional courses using the AB York block and placing all of the blocks with their long sides facing the outside of the curve.
Step 5: End of the Curve
To change the direction back to a straight wall, on the first course at the end of the curve, turn the AB York block around so the short side of the block is facing the outside of the curve. On the second course use the other AB Dublin half (1/2) length piece with the cut side facing out and toward the next section of the wall panel.
Step 6: Additional Courses
Repeat this same process as described in Steps 2-5 for any additional courses. Every odd and even numbered course will be layed out exactly the same with block layout and where the cut blocks will be used.
Step 7: Finishing
Finish the wall with Wall Caps. On curved walls, place the long end of the Wall Caps facing the outside of the curve. Secure them in place with a bead of flexible concrete adhesive along both sides of the raised rings and along the side of each Wall Cap. Learn more about capping your patio wall.
Helpful Tips
- A pre-designed diameter is 81 in. (2.0 m). It takes 28 AB York blocks to make a complete circle. To build a larger radius or other circle options, see building large curves.
- AB York blocks come with a built-in angle on both sides of the block, making it easy to create curves and circles. When building with both straight and curved sections, an AB Dublin half (1/2) length block will need to be used on every other course to transition between them.