Starting Your Design: Elevation View
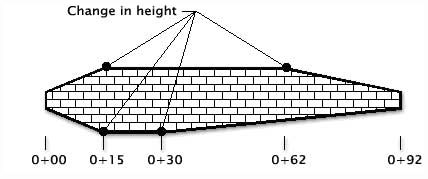
Prior to proceeding to the elevation screen, identify on your site plan anywhere there is a considerable change in wall height. At each of these points a station should be established and the corresponding top and bottom (or finished grade at the bottom) of wall elevations should be determined. Working from left to right the first station is labeled as station 0+00.
Clicking the arrow in the lower right corner will move you to the elevation view input screen.
Elevation View
- Start by entering the minimum amount of buried block you want for your wall design. Enter either the maximum or minimum amount for your wall and then adjust each station as necessary using the table.
- If a critical elevation for block coursing is required, enter the critical elevation in the benchmark cell.
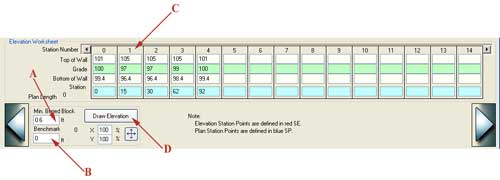
- Input the wall geometry using the table. Use the tab button to navigate the table. The Bottom of Wall cell can be automatically populated by entering the grade elevation then hitting the Enter key on your keyboard. The Bottom of Wall cell will be filled with the grade elevation minus the minimum amount of buried block.
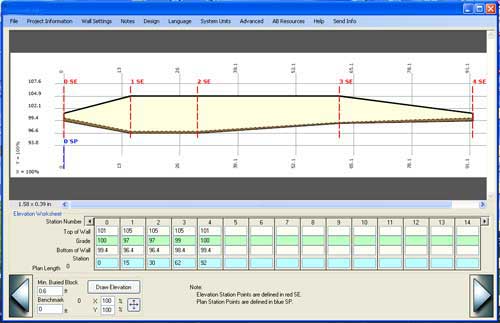
- Once you have completed the table, click the Draw Elevation button to view your wall. Make any adjustments by simply editing the table and then clicking the draw elevation button to update your graphic.
For Advanced Elevation Options, see Appendix A.