Design for Water

Managing water on your site
The design and performance of most retaining walls are based on keeping the area behind the wall relatively dry. To ensure a quality project, the soils used must not become saturated during construction and the final design must route water away from the back of the wall. Incorporating berms and swales into the final design is an easy way to direct surface water away.
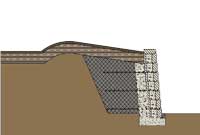
Retaining Wall Berm
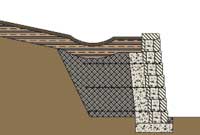
Retaining Wall Swale
During the design process, develop a thorough understanding of the site and determine where water will come from and how it will be properly managed.
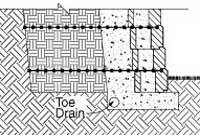
Typical Drains must be vented to daylight or connected to a storm sewer system and must be protected from migration of fine material.
During the building process, stage your materials so surface runoff is not directed improperly. It is also a good practice to cover the infill soils and the entire wall project at the end of each day to prevent water saturation if rain is in the forecast.
Any reinforced wall or walls over 4 ft. (1.2 m) in height or with slopes or other surcharges above the wall will need a toe drain. In all cases wall rock is located within the cores of the block and a minimum of 12 in. (300 mm) behind the block.
The toe drain and the wall rock is designed to remove incidental water from behind the wall and is not meant as primary drainage path for above or below grade water management.
Grading
During wall layout it is important to evaluate the entire site to determine if water will drain into the area where the wall will be constructed. Temporary grading may be needed to ensure water will not drain towards the construction area.
Ground Water
Ground water can be defined as water that occurs within the soil. Sources include surface infiltration, water table fluctuation and layers of permeable soils. Ground water movement must be prevented from coming in contact with the wall structure, including the soils behind the wall.
If subsurface or ground water is encountered during construction, consult an engineer to ensure that the water has been accounted for in your design.
Drain Pipes
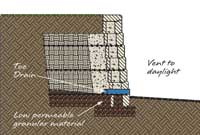
Vent drain through block face
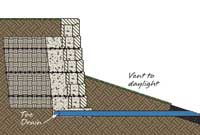
Vent drain to lower grade
Sites with poor draining soils or walls over 4 ft. (1.2 m) tall will require a toe drain.
Drain pipes used in toe drain applications must be properly vented a minimum of every 50 ft. (15 m). To accomplish this, vent the drain pipe to daylight or a lower elevation on the site.
When venting to a lower elevation, it is important that all drain locations are properly marked and protected to ensure that the drain pipe is not damaged or plugged. Rodent screens can be used to allow the water to flow through the outlet pipes and keep the pathway clear of debris.
When Do I Need Drain Pipes?
Follow these rules of thumb:
- All walls taller than 4 ft (1.2 m)
- Sites with poorly draining soils
- Alongside paved areas
- Water lines, mains or fire hydrants
- With slopes above the wall
- On multi-tiered and terraced walls
- All commercial and municipal projects
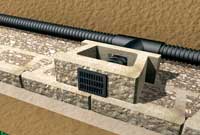
Use a drain pipe to route water from behind the wall. Attach tee fittings at 30 ft. to 50 ft. 9 to 15 m) intervals and direct the drains out through the wall face.
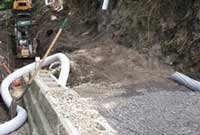
Toe Drain
Concentrated Water Sources
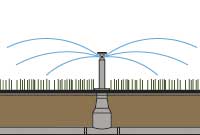
Irrigation System
Prior to constructing the wall, review drainage plans and details to identify all potential sources of concentrated water. Examples that must be accounted for are:
- Driveways
- Slopes above walls
- Grading of site
- Water lines, mains or fire hydrants
- Roof down spouts
- Sump pump outlets
- Irrigation systems

