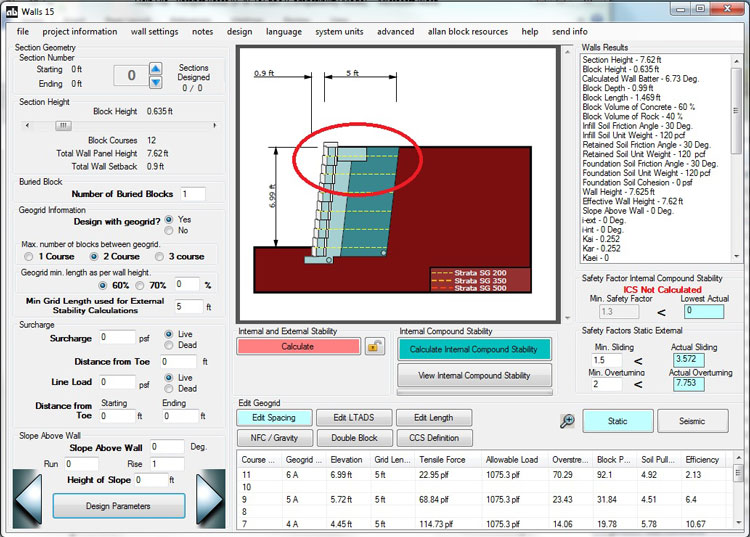
Appendix D: Advanced Operations for Section Screen
Advanced operations are available by clicking the Design Options button located in the lower left corner of the section screen.
Soil Data and Multiple Soil Tabs
- This is the same screen that the designer sees as they enter into the section screen for the first time. The designer can make adjustments to the soils for any section within the wall they are designing.
- Multiple soil types can be used for infill and retained soil zones. Multiple soil type layer configurations are only considered in the Internal Compound Stability calculations in the software. For other internal calculations (such as geogrid pullout from soil) the software will default to the worst case infill and worst case retained soil values for calculation purposes. If multiple soil types are to be used in the project, click the check box for multiple soils. This will bring up the next tab where multiple soil types can be entered.
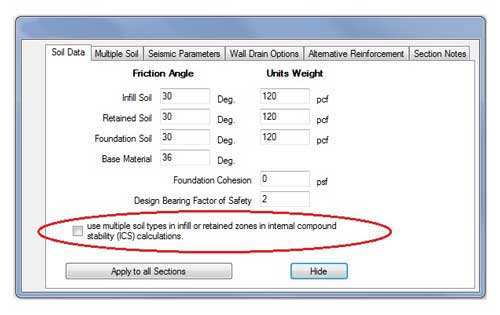
- The multiple soil tab allows the user to customize the configuration of the soils for ICS analysis. The user has the option to use up to three types of infill soil and three types of retained soil. The user will need to specify the friction angle and unit weights for the infill soils (S1, S2, S3) as well as for the retained soils (R1, R2, R3).
- The user has to specify the soil layer vertical height above the toe of the wall. Soils S1 and R1 are the bottom layers. S2 and R2 are intermediate layers and must be above S1 and R1. If using three types of soil, S3 and/or R3 will be the top layer of soil. The program will use the user specified heights for section design. If a soil layer happens to have a vertical starting height that is above the top of the wall then the layer will be ignored by the software.
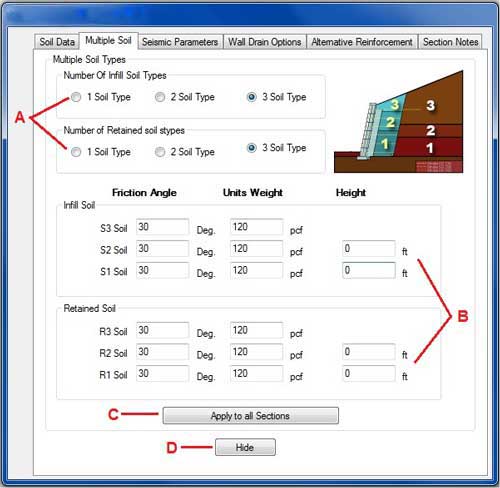
- After inputting the soils information multiple soil types can be used across all sections of a project by clicking on the "Apply to all Sections" button.
- Multiple soil configurations can be modified section by section as well. The user will need to go to the particular section the wish to modify. When in that section same process applies when specifying multiple soil types for a particular section; the user will just use the "Hide" button without clicking the "Apply to all Sections" button when leaving the screen.
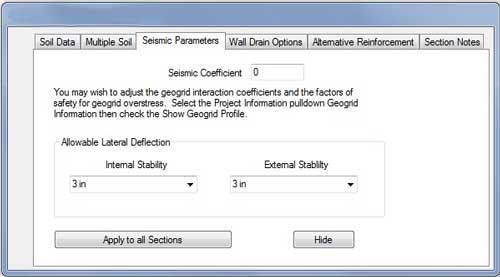
Seismic Parameters Tab
If the wall being designed is located in a seismic zone, this screen is used to input the Seismic Coefficient and allowable lateral deflection during a seismic event.
The Apply to All Sections button applies your change to all the section. Otherwise, the Hide button will apply your change to current section you are designing only.
Wall Drain Options Tab
This tab allows the designer to have flexibility in specifying drainage options for their wall design. For a detailed discussion of water management options see Chapter 3 and 4 of the Allan Block Best Practices Document.
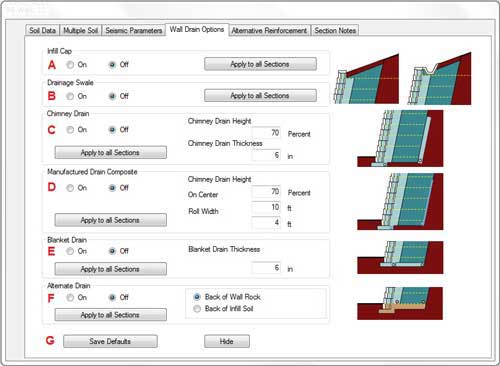
- An infill cap can be added to either a single section or all sections by using the on/off toggle and Apply to all Sections or just the Hide button.
- A drainage swale can be added to either a single section or all sections by using the on/off toggle and Apply to all Sections or just the Hide button.
- Chimney drains can be added to either a single section or all sections by using the on/off toggle and Apply to all Sections or just the Hide button. Additionally the chimney drain height (percentage of wall height) along the back of the infill soil as well as the thickness can be adjusted to meet the projects specific requirements.
- Manufactured Drain Composite can be added to either a single section or all sections by using the on/off toggle and Apply to all Sections or just the Hide button. Additionally the manufactured drain height (percentage of wall height) along the back of the infill soil as well as the on center spacing and roll width can be adjusted to meet the projects specific requirements.
- Blanket Drains can be added to either a single section or all sections by using the on/off toggle and Apply to all Sections or just the Hide button. Additionally the blanket drain thickness can be adjusted to meet the projects specific requirements.

- Alternate Drains can be added to either a single section or all sections by using the on/off toggle and Apply to all Sections or just the Hide button.

- If you use a particular drain configuration consistently for your walls then the "Save Defaults" button will allow you to save the configuration as a default for future designs.
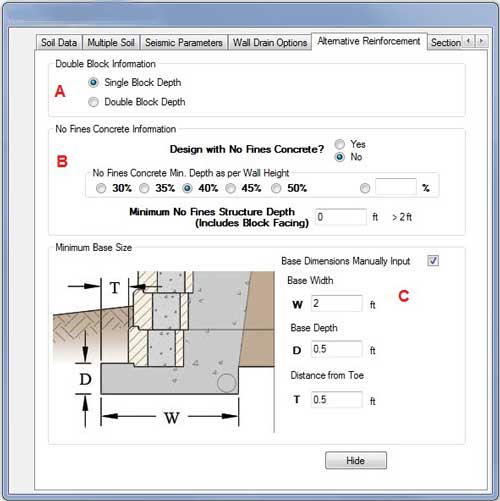
Alternate Reinforcement Tab
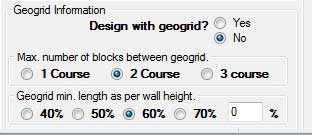
This Screen allows the designer to design a wall using alternate reinforcement methods. The type of reinforcement is selected in this tab. When using alternate reinforcements be sure to click no to the design with geogrid selection. This will tell the software to use alternate reinforcement for the section.
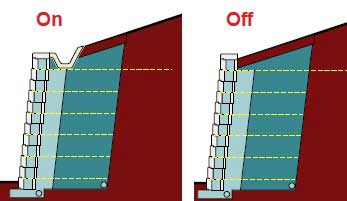
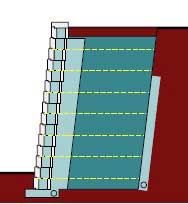
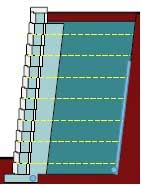
- The user has the ability to choose a standard gravity wall using traditionally stacked blocks and no geogrid. They can also choose a double block depth gravity wall which essentially stacks an additional (inverted) block behind the facing block. The blocks have a horizontal layer of geogrid between them at each course to help tie the two blocks together. A double block wall is used when a traditional gravity wall needs additional mass to retain taller heights.
- The software can also allow a user to design sections using No-Fines Concrete (NFC). The user will click yes to use NFC and then choose a depth based on percentage or they have the option to specify a minimum depth.
- The user can let the software automatically set the leveling pad base size. There is also an option for the user to go in and manually input the leveling pad dimensions.
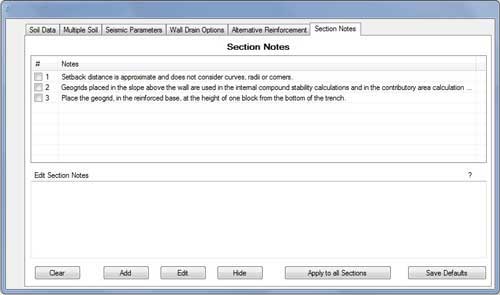
Section Notes Tab:
This screen allows the designer to put specific notes on each section’s printout. You can add or edit a note by clicking the appropriate button. You can remove a note by un-checking the check box to the left of a particular note.
The Apply to All Sections button applies your notes to all the section. Otherwise, the Hide button will apply your Notes to current section you are designing only.
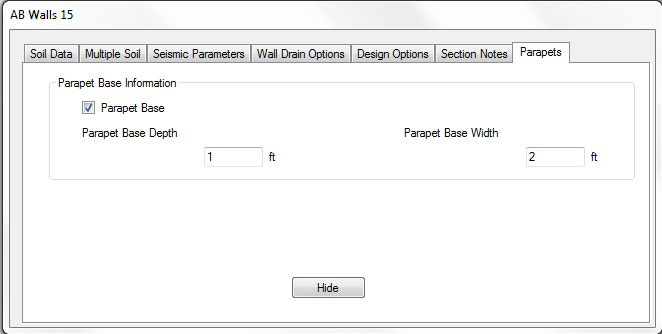
Adding Parapet Bases
- AB Walls offers the capability of adding additional base material at the top of the wall to accommodate a parapet above the wall.
- In the Design Options button there is a tab for parapets. This tab allows a user to select whether to include a parapet base to their wall and it allows them to specify the base size as well.